Quick Photography Tips For Beginners


Here you go… Some short and sweet photography tips to think about!


11219006_989383144438993_977371029481033845_n


  1. A more expensive camera doesn’t make you a better photographer
  2. Rely on the Rule of Thirds
  3. Use a camera sling instead of a neck strap
  4. There is NO easy way
  5. Always have a spare memory card.
  6. Photos do not show the world you have seen, they show the way you see the world
  7. Contemplate your shot
  8. Try different angles
  9. The best equipment doesn’t help if you’re not standing in the right spot
  10. You cannot force a picture to be good
  11. Think about what light you want
  12. Not everyone is beautiful, but everyone is interesting
  13. Prime lenses will make you think more
  14. Zoom lenses are your best friend in street photography
  15. Bump the ISO if needed
  16. Shoot during sunset and sunrise for the best light
  17. Shadows can be subjects
  18. Aperture controls depth of field
  19. Shutter speed controls motion in your picture
  20. Auto ISO is your best friend
  21. Be critical of yourself
  22. Tripods are extremely useful for both interior and exterior shooting
  23. The relationship is about you and the subject, not you and the camera
  24. Show only your best work
  25. Changing photos to B&W does NOT make an uninteresting shot interesting!
  26. Color photography is NOT more artistic than black and white
  27. Two good pictures out of every fifty taken is a pretty good ratio
  28. Use a large aperture for portraits
  29. Use a small aperture for landscapes
  30. Stop hating on others!

Tips For Maintaining Your Camera!

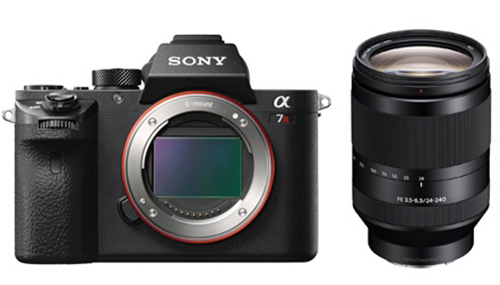
sony


Another question i get asked all the time is “how to maintain my camera?!…”

First, you need to know that DUST and HUMIDITY are the two enemies of your camera!


HUMIDITY

It influences the sensor of your camera. Hence, it is important to keep your camera dry and away from extreme weather conditions when possible.

How many times have you walked out of your air-conditioned place and attempted to take a photo, only to find that the lens and eyepiece of your camera are both covered with condensation? Alternatively, you have spent the day taking photos in the snow. When you get back to your warm room, exactly the same thing occurs.


DUST

In order to effectively clean your equipment, use a soft cloth, such as a microfiber one, and wipe down the exterior to take off dust and other particles that could also creep inside the camera body.


Your shirt is not a suitable cleaning cloth!


LENS CLEANING

Do not spray the cleaning material directly to your lens. Spray the clean material into a microfiber cloth and wipe it slowly to the lens.

There’s a reason your camera comes with a lens cap…to protect the lens!

Lens hoods are another safety feature. Though they’re meant to block sun glare, they have the added bonus of protecting the edge of your lens.


BATTERY MAINTENANCE

Charge a battery only when it has completely discharged and ensure to charge it fully in one go. This simple habit will ensure much longer life to your batteries.

If you don’t plan on using your camera for an extended period of time, it is recommended that you remove the battery.

Even if you do not use your camera, remember to charge your batteries at least once a week.


DIRECT SUNLIGHT

Avoid putting your camera in a direct sunlight.

Do not put your camera inside your car for a long time especially when you park your car in an open space.

The excessive heat accumulation will increase the chance of damaging your camera.


CAMERA POWER OFF

Keep in mind that your camera has a computer system inside it and a sudden change of the electricity may damage it. That is why, you need to turn off the camera before you pull out the battery or memory card and also when you plug in your camera into your laptop.


USE THE AUTOMATIC SENSOR CLEANING

All new camera models have a built-in sensor cleaning systems that vibrate the sensor, or a filter above it to shake off any dust.

This can usually be set to activate when the camera is turned off.


GET A GOOD BAG!

The best way to protect your camera when it’s being transported is to carry it in a decent bag that provides plenty of protection from bumps and drops.

Makes sure that the bag is waterproof or has a waterproof cover to keep the contents dry.


FORMAT YOUR MEMORY CARD

It is recommended to have the habit of downloading all the images from the memory card at the end of a shoot and then format it in-camera.

Formatting the memory card removes all the images and clears any bits of data away so that it can give optimum performance. This is especially important if you intend to shoot lots of images at high frame rates.


CHANGING LENSES

Turn the camera off before changing the lens. That will reduce static charge on the sensor and lower the risk of attracting dust.

Make sure that outside of the rear lens element is clean and free of dust, before attaching it to the camera.

Changing the lenses while shooting should be done fast and in a way with your camera facing down to prevent the dust from reaching your sensor and also allow any dust to fall out of the camera!

Avoid (as far as possible) changing lens outside, especially in windy and dusty conditions.


SENSOR CLEANING

The most talked about issue!

There is nothing more irritating than to see blotches on your photos. When magnified those pesky dust spots can definitely ruin a photograph.

A landscape photographer who is outdoors will pick up more dust and dirt than someone who shoots indoor or in studio.

I always advise to take it to be professionally cleaned.

Damaging a sensor is expensive…


How to choose the right camera for you!

13015659_1373951519316741_5739633685885110856_n

Something i get asked all the time is “What camera should i buy?!”

The marketplace is loaded with cameras in every price range!


What makes a good camera?


You can’t look as a specification like megapixels and assume that more = better.

I always tell my students in the photography courses and workshops the following:

Any modern camera today makes great pictures, but the truth is the person behind the camera makes the photos not the camera!


Buy a camera that fits your life style!


Types of camera

I will explain to you the camera types, you choose what suits you or meets your needs… Next, you can search in the type selected: what is the latest camera brands in the market and the prices… This i will leave to you!


  • POINT & SHOOT: These are a step above a smartphone camera. They’re ideal for someone looking for automatic operation, not for those interested in manually adjusting settings. Image quality with these cameras is perfect for social media sharing and quick snapshots, such as during family vacations or other activities. Many also shoot HD video, and come with shooting modes to really make the process as effortless as possible. New models include built-in Wi-Fi for instant connectivity.
    • Pros:
      • Automatic modes are perfect for beginners.
      • Lightweight and easy to carry.
      • Inexpensive price.
    • Cons:
      • Buttons can be small and fiddly.
      • Most models lack a viewfinder.
      • Generally, not too great in low light.


  • BRIDGE or SUPERZOOM: These are handy for anyone who wants to capture shots from a distant viewpoint. They also include a few more options for manual operation, though image quality is relatively consistent with the basic point-and-shoots with which they share the spotlight. New models reached 50x and even 83x optical zoom, a variable angle LCD screen and built-in Wi-Fi with NFC. 
    • Pros:
      • Manual controls are often available.
      • Plenty of zoom for your money!
      • Good or excellent macro performance, as well as increased depth of field, so more of the picture is in focus
    • Cons:
      • Lesser image quality than cameras with bigger sensors
      • Can be bulky in size
      • Fixed lens and not interchangeable
      • Generally, not too great in low light


  • ADVANCED COMPACT: These are perfect for anyone looking to upgrade to a more advanced system that still remains sleek and comfortable in size. These cameras tend to have larger image sensors and faster processors, which yield higher picture quality and better low-light performance. They offer more options for manual control, and many today are fully capable of shooting in RAW file formats.
    • Pros:
      • Small size
      • Many effects and filters
      • They have many of the programs and manual features that were previously only found on DSLRs a few years ago.
    • Cons:

      • Less zoom capability than cameras with interchangeable lenses and bridge cameras
      • Lesser image quality than cameras with bigger sensors
      • Sometimes can be difficult to get a good grip on due to their small size and slim designs
      • Less control over exposure settings


  • DSLR: These are ideal for someone who understands, wants to learn, or wants the option of total manual camera operation. Someone new to DSLR systems entirely may appreciate an entry-level camera body sold with a kit lens. This would be a great way to get them started with the essentials. A mid-range DSLR may be better suited for those upgrading or expanding into more serious applications. They’re also popular as secondary or backup cameras among professionals looking for a cost-efficient but still high-quality system. Professional DSLRs, such as the full-frame or the APS-C-sized are for photographers who need cameras that are durable and efficient, consistently capturing images of professional quality. They maintain excellent processing speed, quick autofocusing, and optimal low-light performance. Full-frame image sensors tend to respond better to higher ISO settings and boost overall image quality. Full-frame cameras also enable photographers to use a variety of lenses without needing to account for a crop factor; something especially important to anyone regularly shooting wide-angle images. Conversely, top-tiered crop sensor cameras do give that bit of extra reach with lenses, making them ideal for sports, wildlife, and nature shooting, and also tend to have faster continuous shooting rates.
    • Pros:
      • Great image quality
      • Manual settings
      • Loads more exposure breadth
      • Generally longer battery life than the other cameras
      • Optical viewfinder so can see directly through the lens
    • Cons
      • Big and heavy
      • Can be complicated to get your head around
      • Expensive for the camera and lenses


  • MIRRORLESS: These are more popular now than ever. As their name would suggest, they do not house a mirror to divert light into a viewfinder. Instead, they operate similarly to a point-and-shoot, with light falling directly onto the image sensor. This allows shots to be “previewed” on the camera’s LCD screen before each click. Eliminating the bulky mirror and shutter components makes their bodies much smaller and lighter than their DSLR compeers. With mirrorless systems, photo enthusiasts and professionals are given the freedom to shoot RAW and capture high-resolution images without carrying heavy weights.
    • Pros:
      • Small and with technology are now as good as DSLRs
      • Modern and still evolving
      • Electronic shutter with complete silence
      • Shallow depth of field possible / blurred backgrounds
      • Less complicated mechanically than a DSLR, therefore often cheaper to buy
    • Cons:
      • Zoom lenses on small compact style body made them quite unstable unless you purchase a battery grip to balance the weight.
      • Still have less zoom capability than DSLRs
      • DSLRs perform better in sports
      • Battery is drained faster than a DSLR.


How to take a nice self portrait or selfie!


These days self portrait or selfie is quite necessary. Every social network you use asks you to upload a photo of you!

In my latest e-book “The Vision”, i talked a little bit about selfie. Download “the vision” ebook for free.


In my opinion self portrait is simply an exploration of self!.


self portrait


What Gear Will You Need for Self Portraits?

If you are interested in a self-portrait that is more than a classical one, you have to use the following items with a camera:

  • A tripod to put the camera on
  • A remote to click the shot from a distance also the self timer with 10 seconds can do the job, but i recommend a remote!
  • Lighting: from flashes to a regular lamp in your home! There are many ways to play around with light.
    • One idea: try using a flashlight in a dark room to focus on one element (your face, your hands, etc.).

With your phone: Sometimes all you have with you is your phone and you don’t want to take another arm-length selfie. No worries, there are tons of self-timer apps available to help you take better phone photos, download a few to find out which one you prefer, and try balancing your phone on a stable surface in front of you. Also don’t use the front-facing camera on the iPhone because it lowers the photo resolution. Always use the higher quality camera on the back of the phone. OR use a selfie stick… some apps remove the selfie stick from your photo!


“Try to have a vision before you start!”


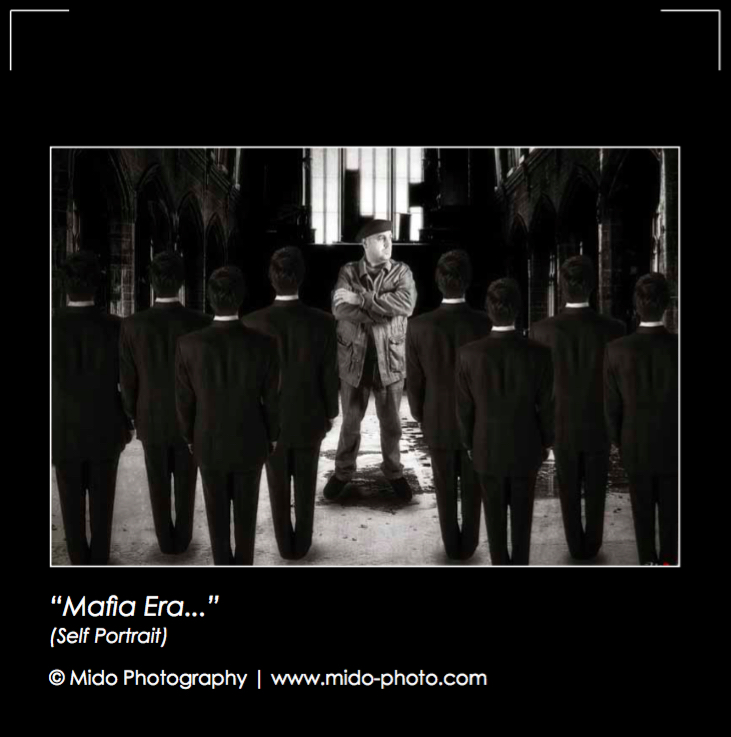
Creating a Composite Self Portrait in Photoshop

That’s my favorite!

Shooting your self in a location and add something to the shot in post editing ( i use Adobe Photoshop ).

Experiment with photo editing and make the most of your photos!


Selfie2 from the vision book

Photo capture from “The Vision” e-book

Tips


  • Don’t force emotion!
    The camera never lies. Relax and be yourself.
  • Let it tell a story!
    A self portrait is a quick look into your mind. Think about how you want to convey a message of who you really are.
  • Learn from your mistakes!
    Review each photo and see what you can do better. Look at the light, emotion, does it convey the message or story. Change what doesn’t work and be critical.
  • Get creative!
    Composition is everything. Try new angles, try new crops, photography is art so think about ways in which you can mix things up.
  • Watch your background!
    You background is almost as important as you are in the self portrait. If it doesn’t relate to your story use a shallow depth of field to blur it out or change where you are shooting.
  • Try to overexpose/underexpose your photo!
  • Don’t always look directly at the camera!
    Look down, look up, look off camera or turn your back to the camera. It adds variety to your photos, and also gives you a chance to show of different angles of your outfit.  Not looking directly at the camera gives photos a more candid feel. It can make you look more natural, rather than posed and rigidly looking into a camera lens.
  • Remember, you can look at what you have and take more shots!
    Check the angle and lighting and find the most flattering position. I like to sit facing a window when I take photos (with the flash turned off). window light can be really nice on the skin.


How to get ready for a studio photoshoot!

First, think about what message you would like to put in your shooting…

Is there a specific theme or idea in mind? discuss it with the photographer first.

Do you want to be smiling or do you want to be moody and emotional?

Tip: Look at your past photos and see what works well on your body!

Now let us move on after selecting the theme or mood in the photoshoot to the details:

  • Clothes: First question: what should i wear? Make a good selection of clothes…
    • I always recommend to bring along a number of different outfits in various styles and colours.
    • All you intend to wear should be laid out, clean and ironed. wrinkle-free clothing will help make your photo much more professional.
    • No florals, or large busy prints. Plain colours are best.
    • Don’t wear tight clothes or bra prior to photoshoot since they leave strap marks and take a while to go away.
    • Accessories are the secret ingredient… I am sure you have enough accessories in your closet for this. Bracelets, hair clips, hats, rings, belts, glasses, earrings, etc…
    • Shoes: Think smart, what can suit many dresses, always bring both flat and heels.
  • Posing: Practice different poses in the mirror at home – different faces (smiling, seductive, happy, etc…).
  • Hair: Check your hair! If it has been a while since you had a trim, now is the time.
    • Do NOT arrive to your shoot with wet hair.
    • Bring a hair brush along as the photographer will want to show your hair off with various looks.
    • bring a couple of hair clips or rubber bands to put your hair up or in a different style.
    • Body Hair: Be sure to take care of all hair removal 2-3 days before your shoot appointment. This time is necessary to allow for any skin irritation to disappear before your shoot.
  • Makeup: Come to the shoot mostly made up.
    • Bring plenty of makeup with you for touch up.
    • You will also need to use an unusual amount of powder on your skin to kill the white shining skin.
    • Lips: Avoid dry lips by putting Vaseline on your lips before bed and the morning of your photoshoot.
    • Eyebrows: Have your brows shaped.
    • Skin: Coconut Oil is great for keeping the skin glowing.
  • Nails: Take care of your nails. Be sure that your nails are neat and well maintained.
    • French manicure, light-pink, etc… look is preferable.
    • If you plan on posing barefoot, be sure your feet and toes are in good condition.
    • Be careful your nails colour does not detract from you and your face.
  • Perfume: If you wear perfume to the photoshoot (not recommended), make sure it’s very light. Photographers studios are not always large and strong perfume will overwhelm the photographer.

Do NOT forget to:

  • Eat: Eat something light before the photo shoot so you’re not hungry during the shoot. you will look better, be more focused and have the energy throughout the shoot.
    • Water: drink plenty of water starting a week in advance of your photoshoot. This will hydrate your skin.
  • Rest: Get plenty of rest the night before the photoshoot. your energy will shine through in each pose!
  • Music: Bring your own CD. The music you like to listen to will help you relax.
  • Be on time 🙂

How to look good in your photos

People describe themselves as “photogenic” and some “not that much!” but the truth is that a lot has to do on how you react to the camera.

Now with Facebook, Twitter, Instagram and other social media platforms, your photos will be seen immediately by your friends, family, and the world at large.

Here’s a secret: Those models and selfie queens who look incredible in photos aren’t necessarily the most beautiful… What they are is: skilled!

I will give you some posing tips that will really make a difference to your photos…

1- Learn to stand right in front of the camera: How you stand can instantly add or subtract 5+ kg. Standing straight in front of the camera can make you look frumpy. Standing at a 3/4 turn or even with your body to the side will cut your size in almost half, you’ll create an instant slimming effect!

Try the “red carpet” pose: put your hand on your hip, angle your body to the side and turn your head towards the camera. It’s a cliché, but it really does work to help you look slimmer.

2- Face your mirror: When in doubt, practice! Stand in front of that mirror and smile, smile, smile. The best way to find out your best angle or smile is to practice. Decide what positions you look best in.

  • Decide if your right or left side looks the best. Our faces aren’t completely symmetrical, so one side generally looks better than the other.

It may sound strange, but it works! We all have a good angle, you just have to find yours and then work with it.

3-Tilt your head: When you look at the camera, don’t look straight at the camera. Look slightly above or slightly below. Then, tilt your head up or down slightly.

  • To get a stronger jawline and reduce the likelihood of a double chin, tilt your chin down. It will help you look great.

4-Help Your Eyes Be Seen: It is important to use an eyeliner to define your eye shape, otherwise you tend to lose the eyes in the photo.Curled lashes and mascara are musts!

5-Lighten your lips: Avoid dark and brown lipsticks, which can look like, well, the kiss of death in photos ( unless you are going for a specific theme like gothic ). Instead, opt for a warm pinky rose or peach. Matte or slightly shimmery is best. A super-glossy finish can make lips look drippy or waxy. If you’re not a pink- or red-lip kind of girl, then even using a neutral hue will help.

6-Your hair: The first thing to remember is that hair sitting on the shoulders looks terrible.Make sure your hair is shiny. Spray-on shine is great for a last minute add-on shine!
There are five different things that you can do with your hair:

  1. Hair all behind the shoulders.
  2. Hair all in front of the shoulders
  3. Hair all on one side.
  4. Hair all on the other side.
  5. Hair up.

7-Blush: Blush is a must! Without some color on your cheeks, your face can look flat in photos.

8-Do something with your hands: If you’re standing, place the hand closest to the camera on your hip; this adds definition to your upper arm. If you’re sitting, clasp your hands in front of you so your arms form a soft arc.

daniella11        daniella43         nancy12